Okay here it is... I'm still not happy with the photos but they will have to do.
Click on the photos for a closer look.
Step 1: First I assembled a group of old canes. The canes are 2" long.

Step 2: I laid the corkscrew canes down lengthwise and cut them into quarters and sliced the striped cane from corner to corner.

Step 3: I then arranged the canes. I decided to put stripes on both ends so got out another hunk of the striped cane and sliced it from corner to corner.
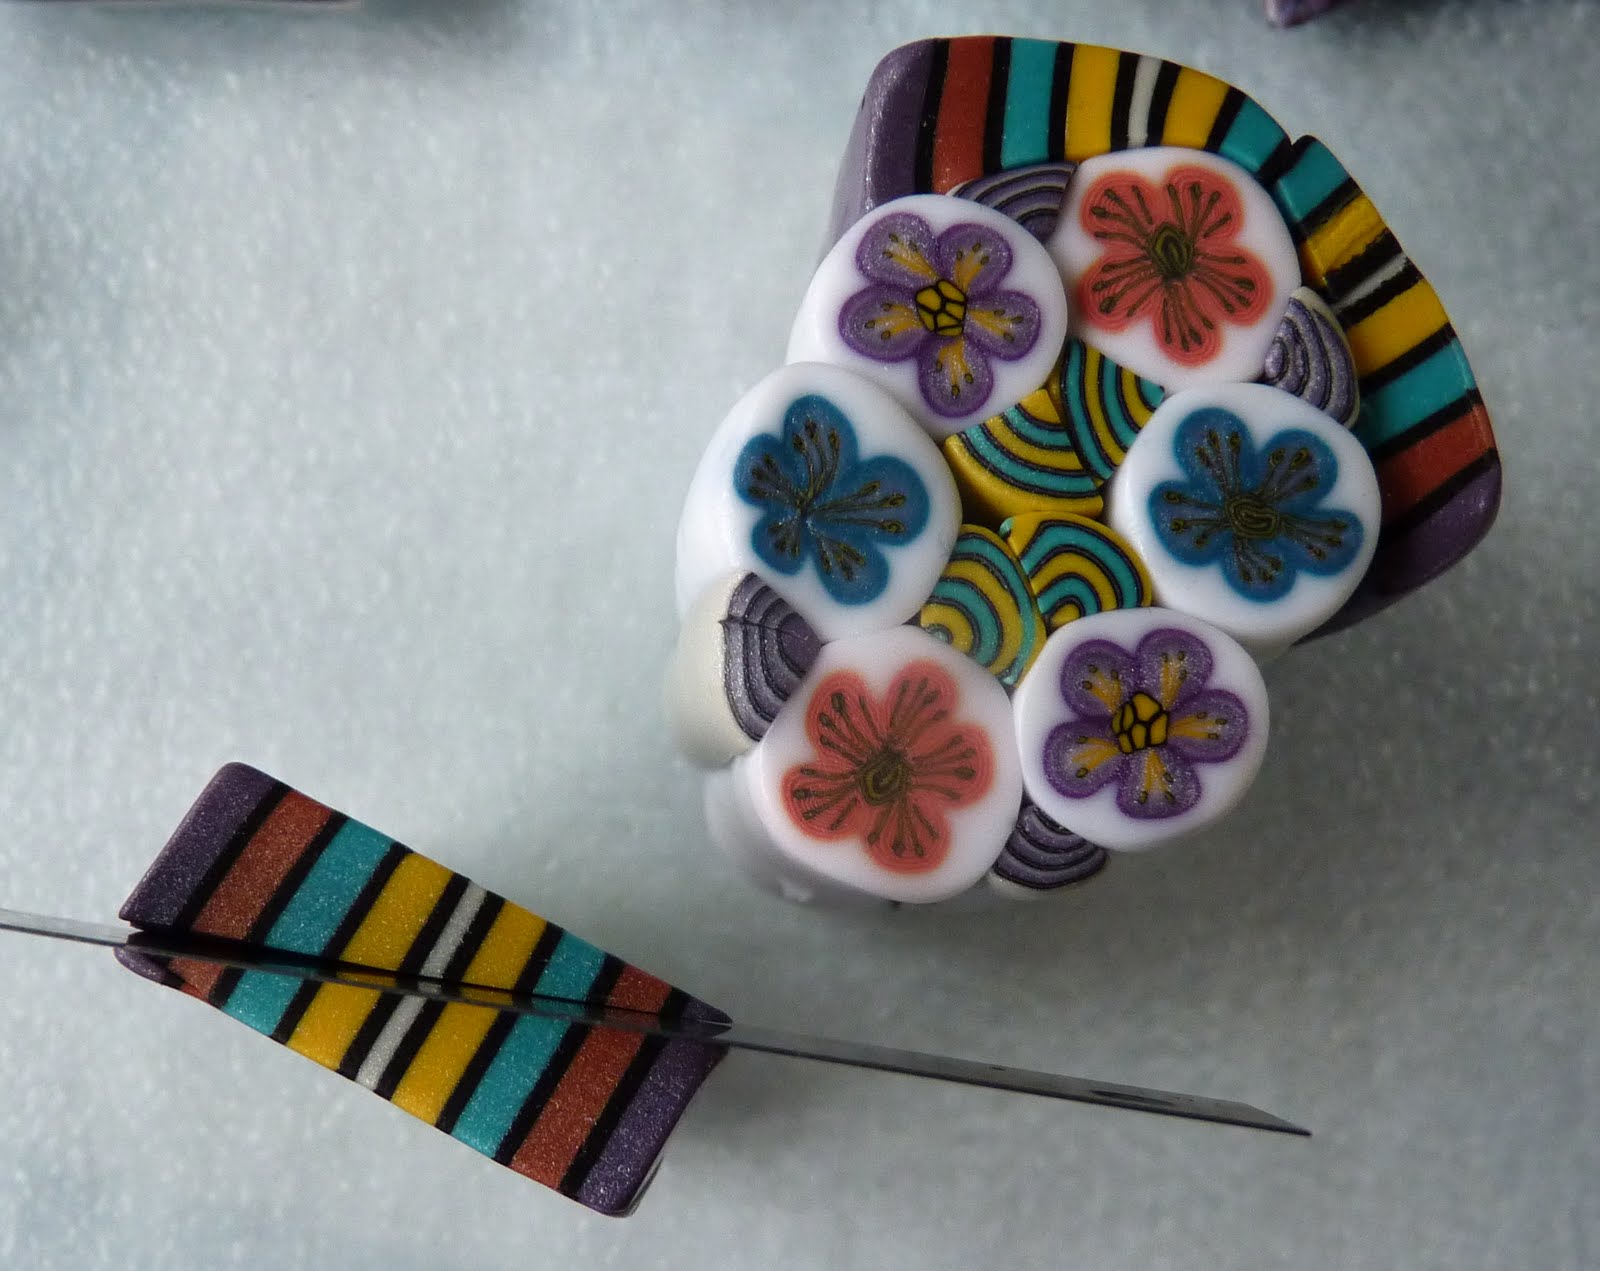
Step 4: I then needed something to fill in the sides. I picked out a bullseye cane that matched the color of the orange flower.

Step 5: I sliced the bullseye cane in half lengthwise.

Step 6: I placed the halves on each side of the assembled came, curved sides in.

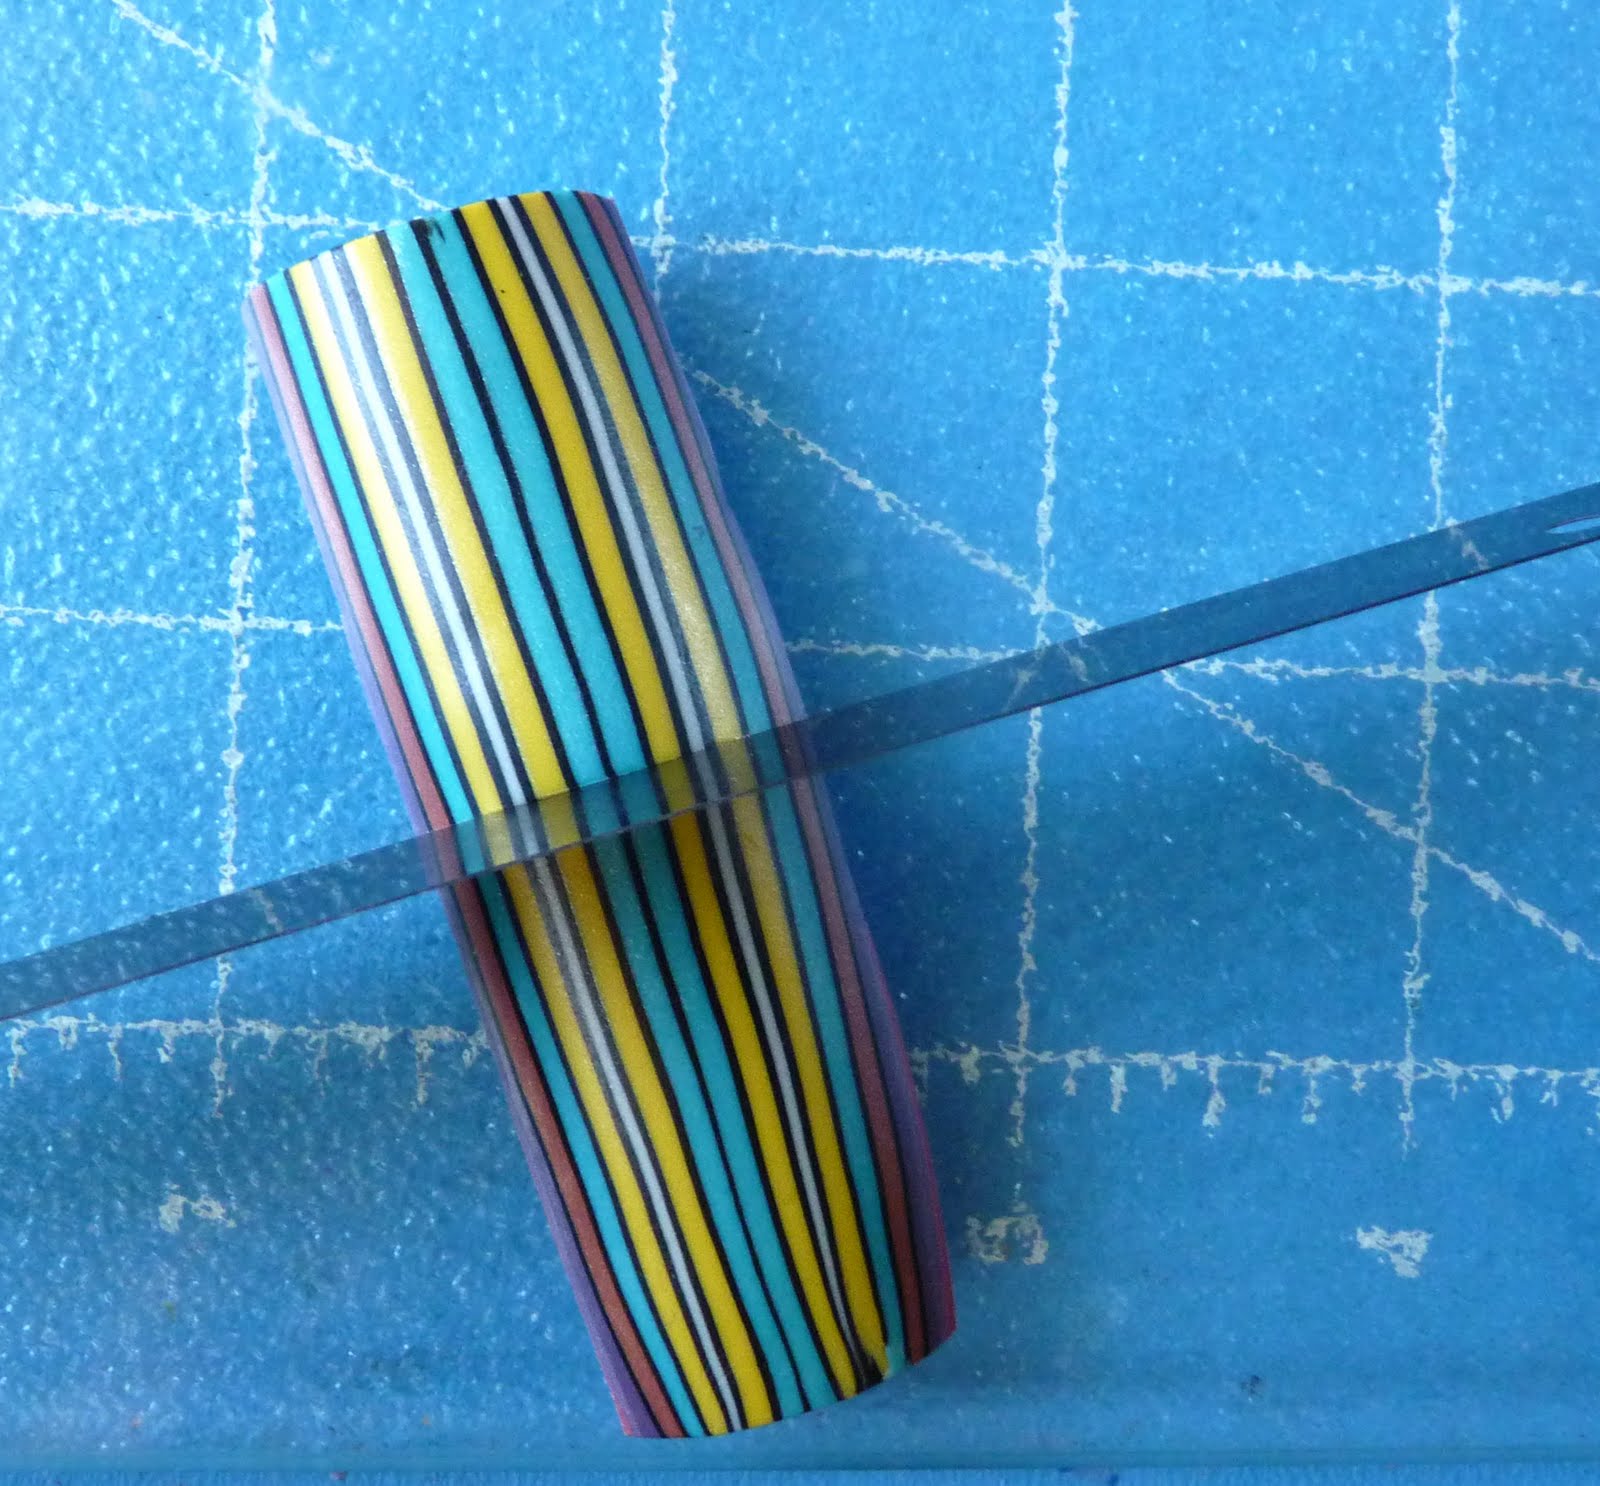
Step 7: I then squeezed the cane to remove the air pockets and began reducing it.

Step 8: I gently squeezed, rolled and pulled the cane to approximately 6" I then trimmed the ends and cut the cane in half.

Here is how they look standing on end.
Step 9: I set half aside. Using my square acrylic rods I formed the other half into a square. I did this by placing the cane between the rods and squeezing and making quarter turns until I formed a square log

Step 10. Once I was satisfied with the square I stood it on end and carefully sliced in half from corner to corner. I slice very slowly and follow the stripe lines to make as even of a cut as possible.
This is pretty tricky, if you haven't done it before I highly recommend practicing on square logs of scrap clay.

Step 11: I set one piece aside, laid the other down on the flat side and cut it in half.(I somehow missed taking a photo of this step, sorry) I then carefully lined up the two triangles into a square. Check the ends and try to keep the design the same on both ends. After finishing the first I did the same with the other half.

Step 12: I then reduced each cane to approximately 5"

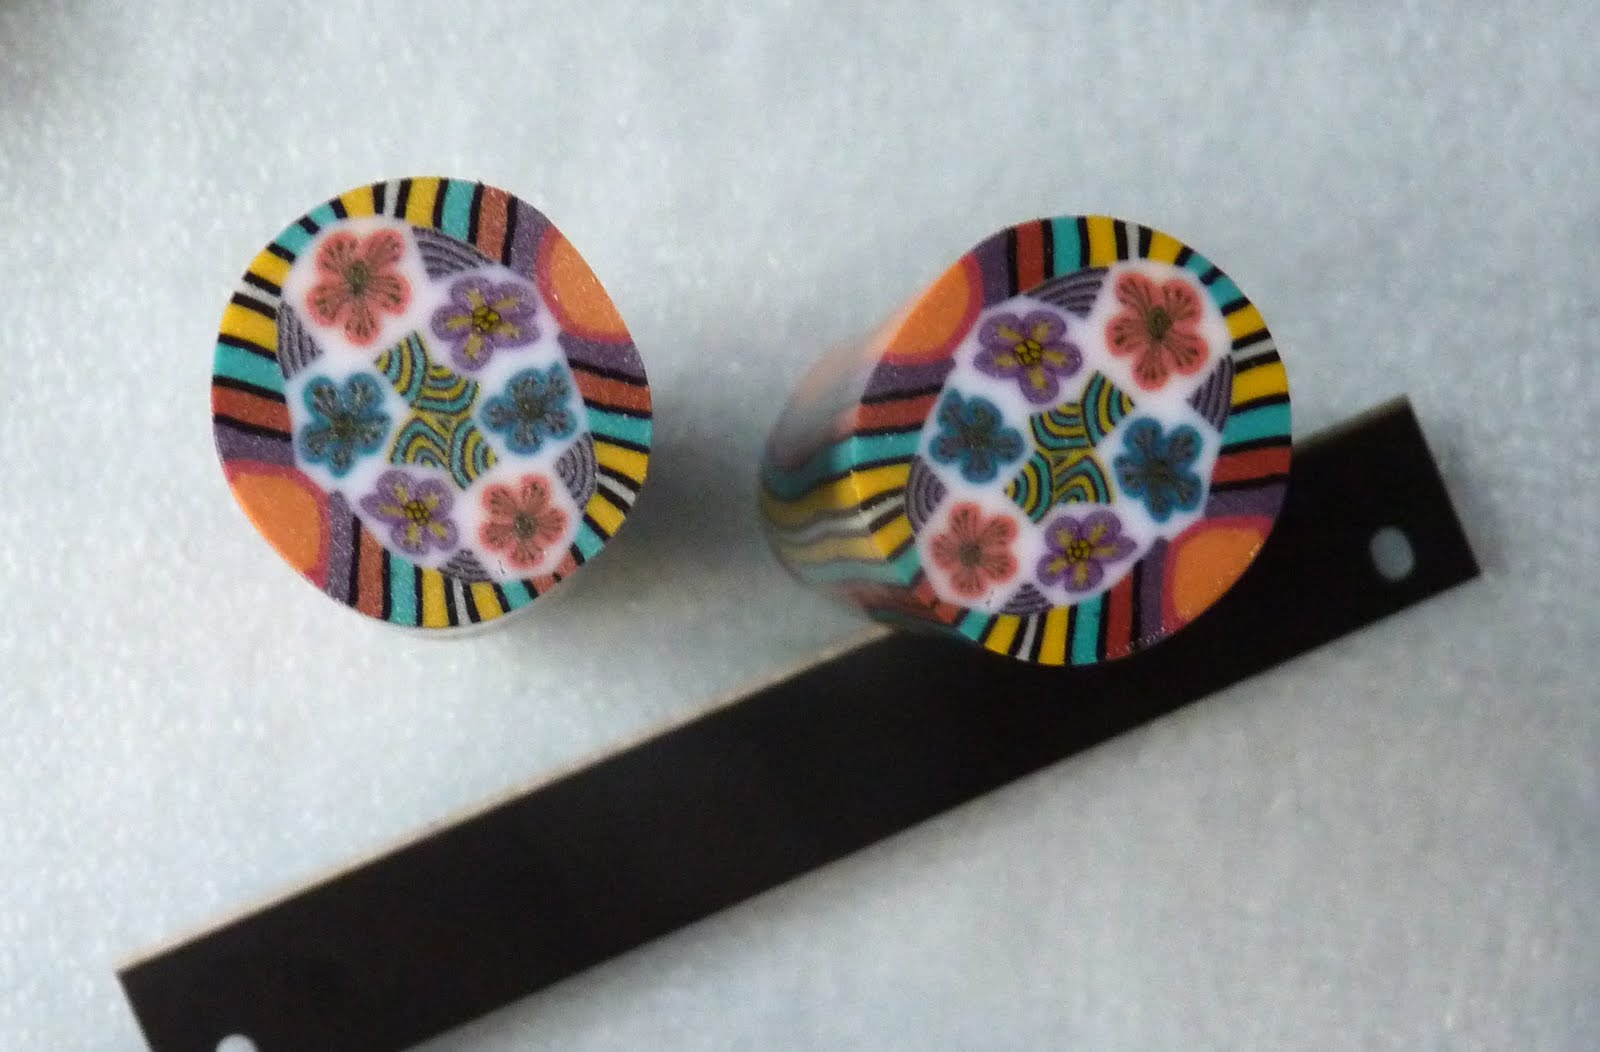
Step 13: Trim about 1/2" of each end. Cut the log into 1" pieces and assemble into a kaleidoscope canes.

Step 14: Remember the half I set aside in Step 8? Here is what I did with the other half. Instead of forming a square log I sliced 1/3 off of the round log.

Step 15: I followed the stripe lines to make an even cut. Again I take my time and cut very slowly.

Step 16: I laid it down on the flat side and cut in half.
Step 17: I then put the two pieces together and formed an oval cane. This can easily be made into a round or square cane but for now I like the oval.

Step 18: I cut the rest of the round half into two pieces

Step 19: I laid them down flat like in step 16, and cut them in half and made these two canes. They can be used as is or reduced, cut in 4th's and formed into kali canes.

And there you have it, my version of making "new canes from old canes". Hope you find it useful.
A word of caution, if your old canes are dry or crumbly don't try to use them with more pliable canes, they won't reduce properly and will ruin the cane.
Thanks for stopping by.
Thank you for sharing this, very cool! :)
ReplyDeleteNice tute!
ReplyDeleteYou are very welcome Trina.
ReplyDeleteThanks Marlene. I tried to leave a comment on your blog... I love Jack Skullion, very creative... but blogspot wouldn't let me, so I'm posting it here.
Wow, Beej. Thanks a ton for this. I have gobs of old canes and was green with envy over what you were doing but my brain cell couldn't figure out how you were making yours. This is a super duper tute! You did good. xoxoxo
ReplyDeleteYou are welcome a ton.... I did it just for you ( you believe me don't ya?)
ReplyDeleteCoolness!! Very well explained, I like it a lot.
ReplyDeleteThanks Jackie
ReplyDelete