
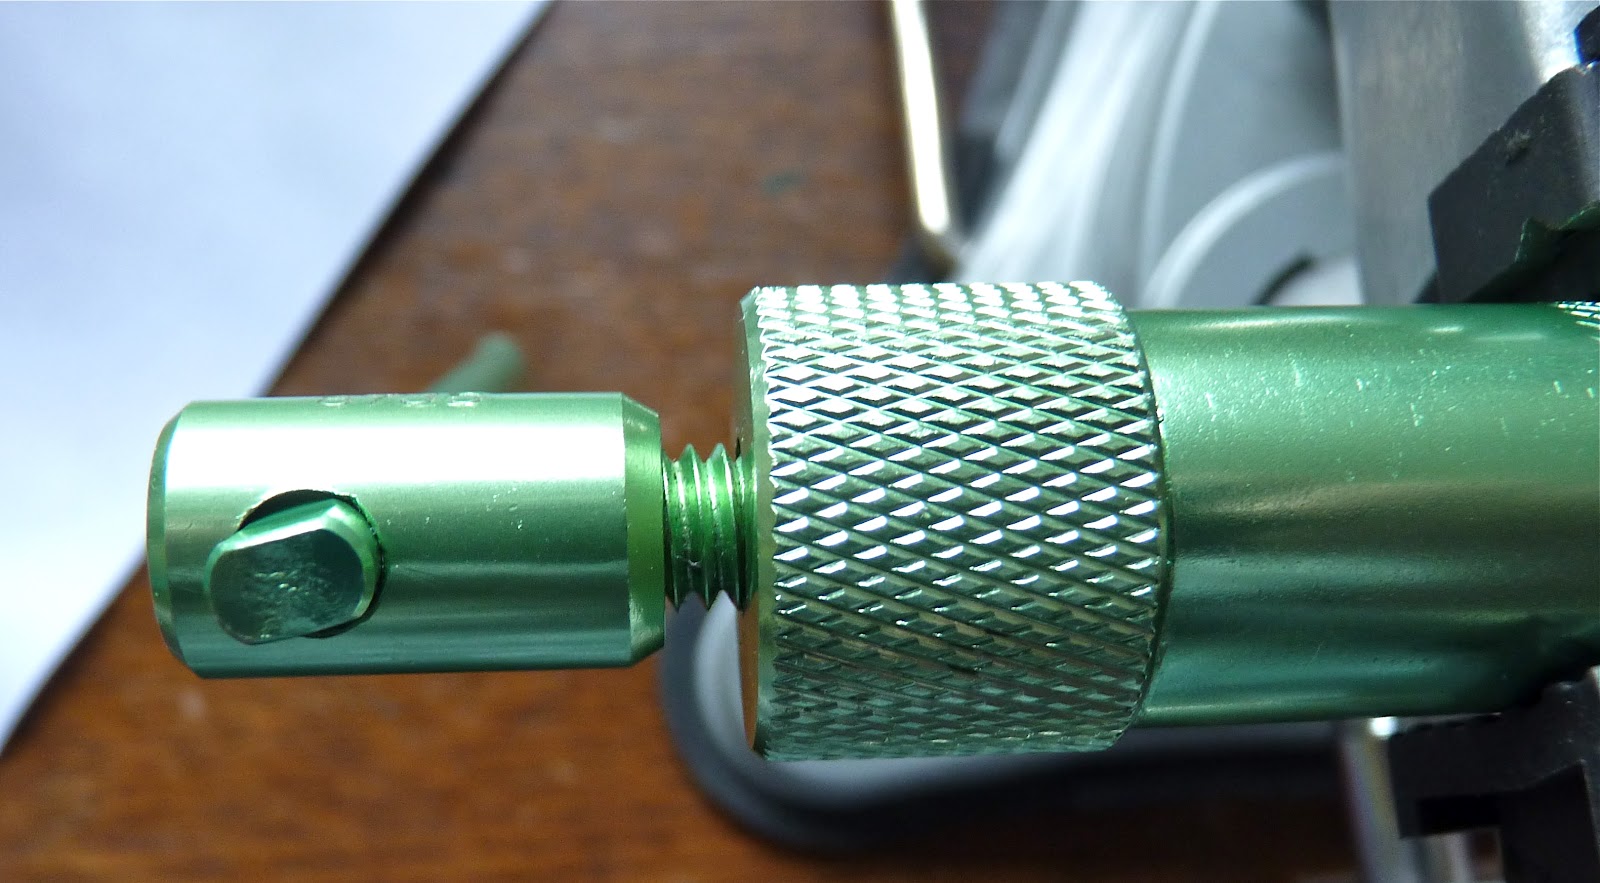
First of all you will need a pasta machine, mine is a "Monafied" Atlas so I will be referring to the settings on it. And you will need a good extruder. I use a "Makin's Professional Ultimate Clay Extruder" and a "Workzone" vise. The vise isn't a must, you can turn the extruder by hand but I'm old and have arthritis in my wrist so the vise saves a lot of moaning and groaning.. it works for me.
You will need to select your colors. I used shades of purple for this cane. You will need 3 shades of whatever color you choose, (or you can use 3 different colors) one dark, one medium and one light. I mixed colors to match a paint sample, you can see a portion of it above the cane. I use a combination of clays to get the right consistence. The new Premo and new Kato are both very soft for caning so I add other firmer clays, like older formula Kato translucent and/or white Pardo Art Clay (the kind in the blister packs, not the jars). You can also leach the clay until it becomes firmer but I don't have the patience to leach. You want the clay to be firm enough to not squish when you work with it but not so firm that it's difficult to put though the extruder.... like Goldilocks you want it to be "just right".
First I made 2 bullseye canes and a jellyroll cane. One bullseye cane is the light color with a dark border, the other has a dark center with a light border. To make the bullseye cane roll a log of light clay, run a sheet of the dark clay though the pasta machine to the #4 width and surround the log, do the same with the dark log and light border.
I made the jellyroll cane with long strips of all three colors, place the strips on top of each other and roll them up like a jellyroll. Then add a border with one row of light clay and an outside row in the medium color. If you need visuals, there are free tutorials on how to make both bullseye & jellyroll canes... just Google them.

Each of the canes should be approximately 1/2" wide and 3" long.

Using the square disk for the extruder insert the jellyroll cane into the barrel of the extruder. Make a 1/4" plug of the medium color clay and place it in the end of the extruder. If you don't use the plug the first part of the clay that comes out of the extruder is distorted, the plug avoids wasting the design. It also just occurred to me that I should have made a plug for the other end of the cane for the same reason... sheez, wish I'd thought of that earlier.


The extruded cane will be quite long so you will need a long area where you can lay it flat. I have two work areas, one where I sit and one where I can stand. The standing area is an antique postal desk so it is long enough for me to lay out long canes. I put down parchment paper beside my work area to lay the cane on and keep it clean.
Trim the first 1 1/2" To 2" off the end, that will be the"plug" and any distortion to the jellyroll cane.

Cut the extruded cane into 2" lengths

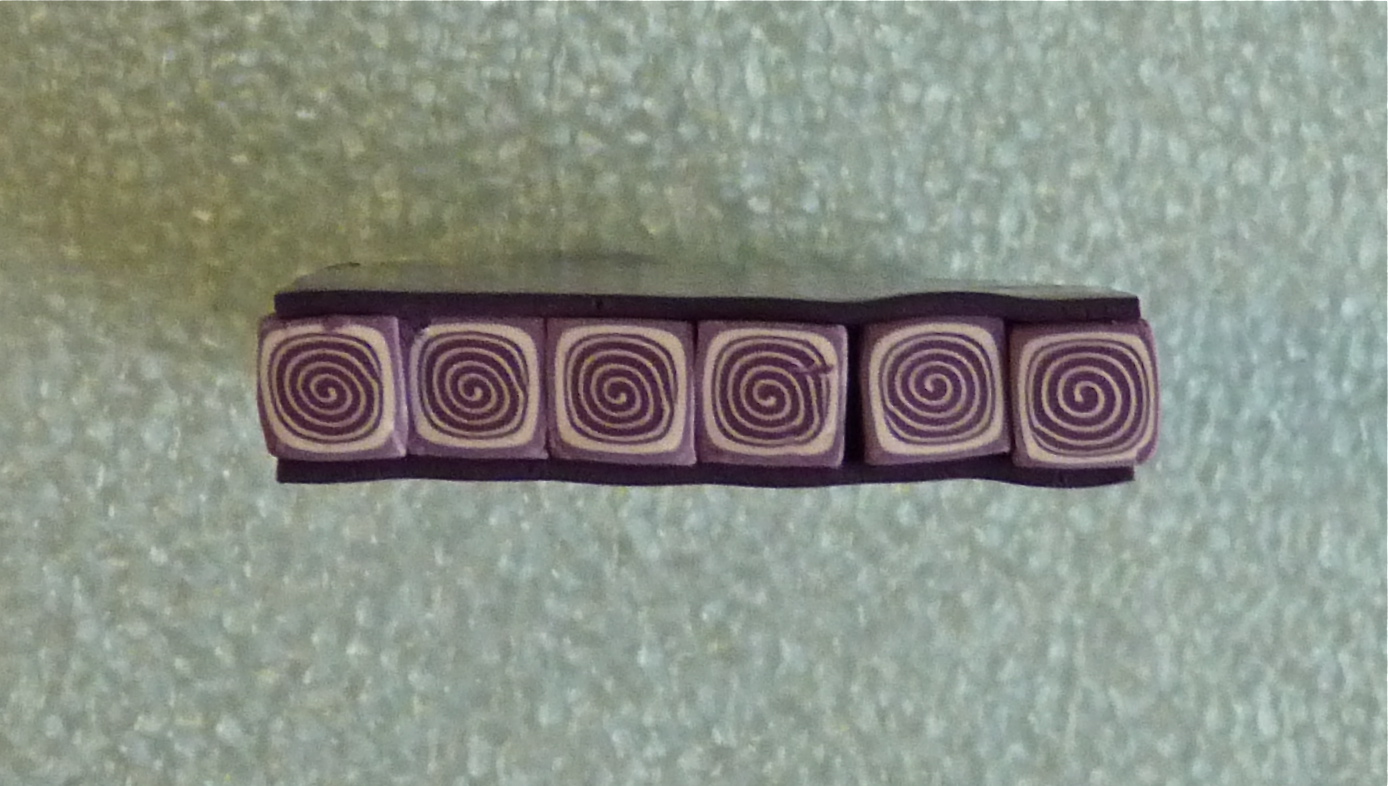
Lay them side by side

Here is how they look from the end.

Run a 2" strip of the darkest clay though the pasta machine to the #4 setting. Lay it on the work area below the canes.


Trim the sides of the sheet with your blade.....

....and again using your cutting blade pick it up, flip it over and place the uncovered side of the canes on the clay strip. Smooth the sheets in place and work out any air bubbles.
.

Now pick up the row of canes and gently pinch one end.. like so. Yikes! don't look at my ugly fingers and nails, I've been working in the yard.
Run the strip through the pasta machine on the #1 setting, pinched end first. Take care to insert it evenly to prevent distortion. Lay it out flat on the work area.

Trim the ends.

Cut in half and set aside.

Change the disk in the extruder to the equilateral triangle and get out the bullseye canes.

Insert one of the bullseye canes in the extruder, remembering to place a plug of the border color at the end of the cane. If it is difficult to slide the cane into the extruder lightly dust it with corn starch. I use a cotton hanky filled with cornstarch to dust a little onto the cane.

This extruded cane is going to be twice as long as the square one so extrude slowly so it won't kink or break. Lay it out flat and cut into 2" lengths.

You should have 2 sets with 6 2" pieces in each set.

Now do the same with the other bullseye cane..... don't forget the plug....

Cut two sets of 6 to go with the others from the first triangle canes. I had a couple extra, I can play with those later.

Place the dark triangles in between the light triangles making sure that both ends line up properly. Press them together.

Trim the ends.

Run a 2" x 2" sheet of the lightest color clay through the pasta machine to the #4 setting and do the same with a 2" x 2" sheet of the darkest clay. Place both sheets on the work area. Place the triangle canes, light side down, on top of the dark sheet and trim. Slide the blade under the clay flip over onto the light sheet and trim as before.... clear as mud right, sorry.... I forgot to take the photos, the end product should look like this.

Now do the same with the 2nd set of triangle canes. Pinch one end like before.....

....and run through the pasta machine, pinched end first. Do the same with the 2nd row of triangle canes. As you can see, the 2nd one went a little wonky so I had to trim off that end. Trim the ends on both sheets. .

The sides are ragged, I will take care of that later. Cut each sheet in half.

Take the 2 pieces from the first sheet and fit together like so..... do the same with the 2 pieces from the second sheet. Set these aside for now.

Roll out sheets of light, medium and dark clay to #4 on the pasta machine. Cut two 1 1/2" squares of light, two 1 1/2" squares of medium, and one 1 1/2" square of the dark Assemble the center of the border cane by placing the squares on top of each other... light, medium, dark (in the center) then medium and light.

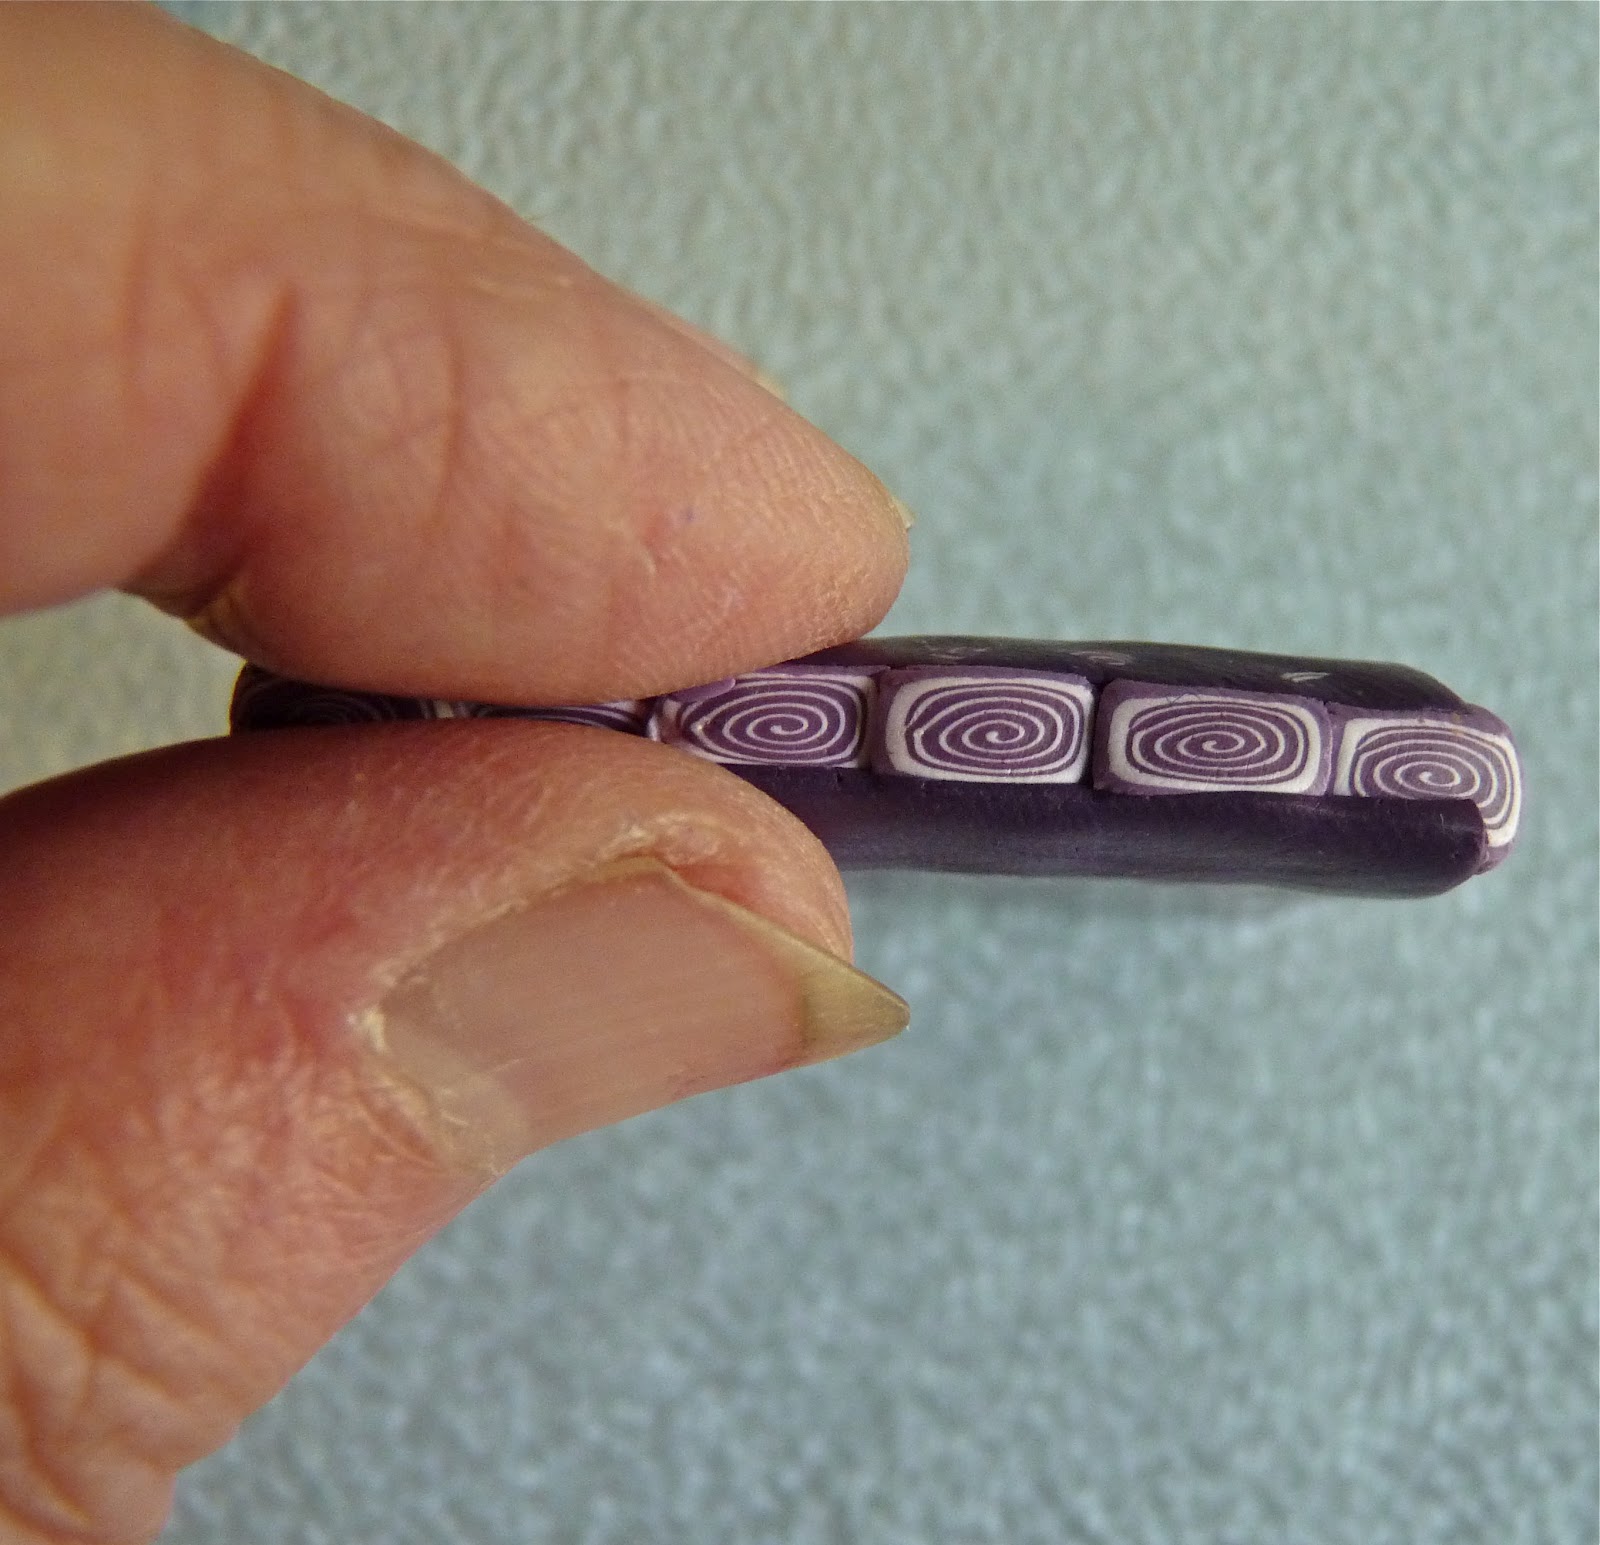
Here is how they line up from the side.

Now we are ready to assemble the border cane. Lay one of the jellyroll sheets on the work area, place the stripe center cane on top of one of the jellyroll canes and trim off the excess jellyroll cane.

Flip it over and lay on top of the 2nd jellyroll sheet and trim the excess once again.

This is how it looks so far.

Now put the triangle sheets on each side.... like this. and trim the ends.

The sides are ragged so stand the cane on end......

and trim the sides. I usually don't have to trim as much as this but all the sheets came out of the pasta machine with ragged sides and they need to be cleaned up.

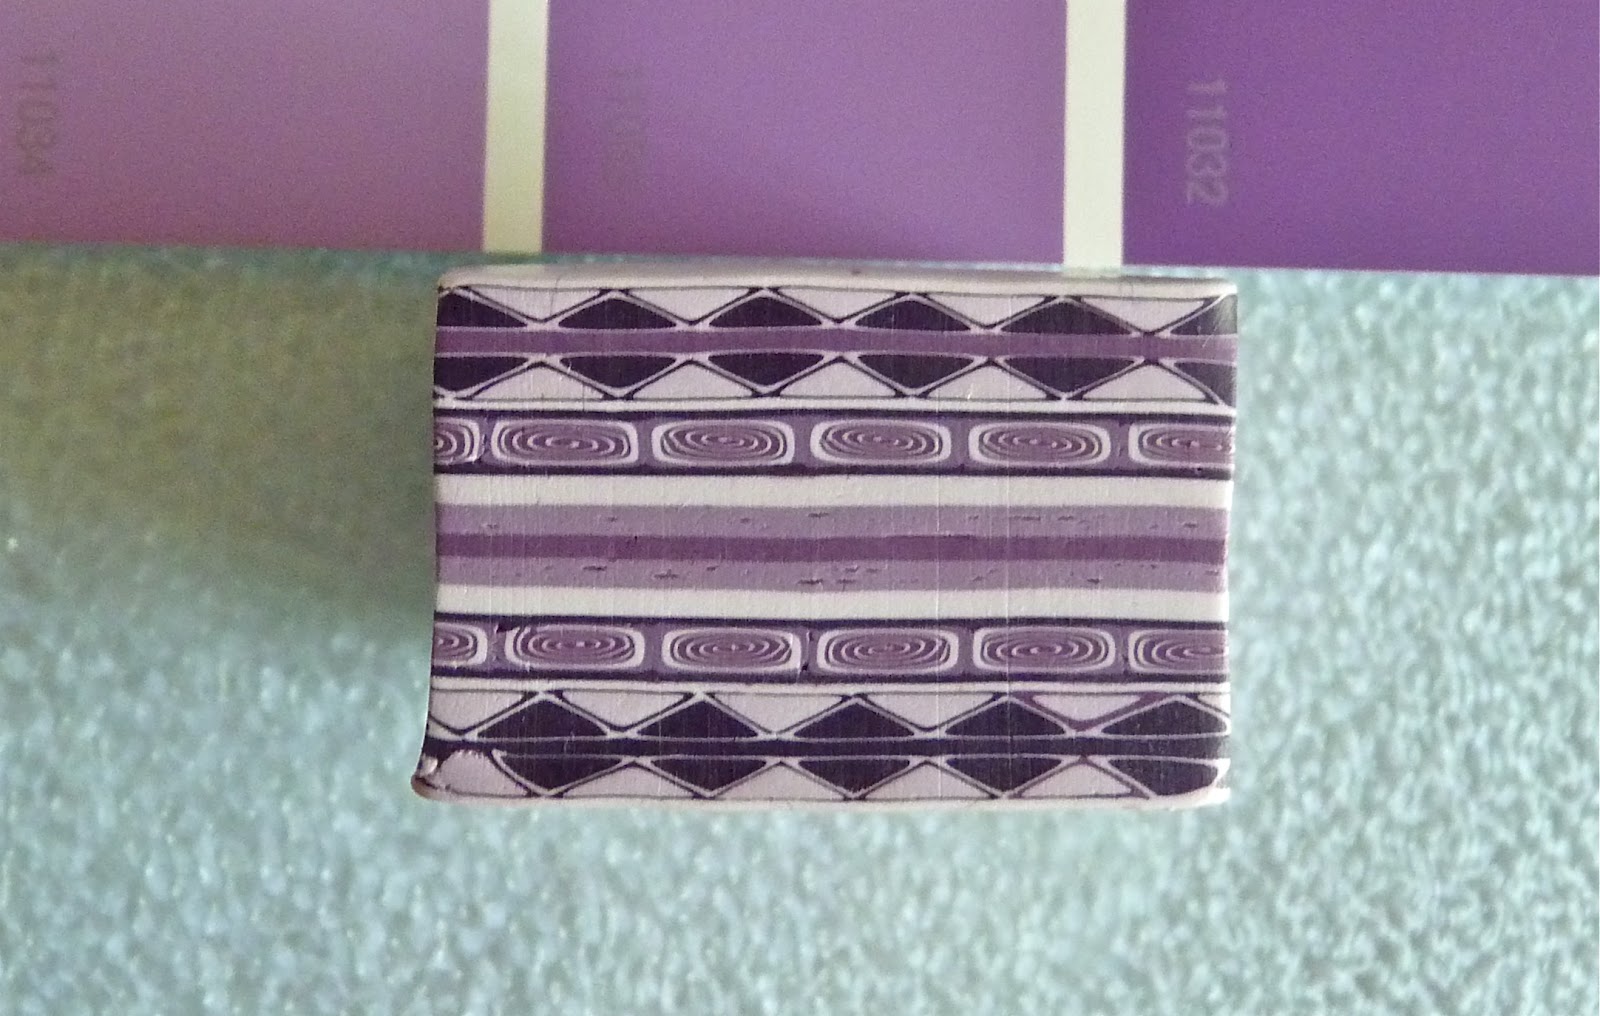
And here is the FINISHED BORDER CANE. The cane measures 1" wide x 1 1/2" long x 1 1/2" deep. This is smaller than most of the border canes I've made but it shows you how they are made.
As I gathered up the scraps I couldn't resist making at least one mirror image tile and a little square cane. I still have the end pieces that I trimmed off and some odds and ends scraps, they are always fun to play with.

I hope you find the tute useful. If you have any questions or need additional information please let me know. (Poor Bonnie can stop holding her breathe! She has to be dark blue by now!)
Thanks for stopping by.
Wonderful Tute, BJ! Great pix and descriptions! Thank you sooooooo much for sharing it with the Polymer Clay Community!
ReplyDeleteAWESOME!!!
ReplyDeleteIt is just wonderful!! Thank you very much for this tute!
ReplyDeleteSuper duper !!!!! LOVE THIS !! And I learned something completely new: did not know how a jelly roll or bull's eye reduced like this in the extruder. Yeah! New ideas.
ReplyDeleteThank you so much BJ
Thank you so much for sharing this with us B.J.
ReplyDeleteFabulous BJ, thank you so much for sharing xxxx
ReplyDeleteGilly
Merci beaucoup pour ce tuto; excellente idée BRAVO
ReplyDeletec'est superbe,merci pour ce joli cours de clay gun!!!
ReplyDeletemaloufimo.com
This is one of the best tutorials ever!! Thank you so much for posting it.
ReplyDeleteBJ, thank you, I'm not blue yet but almost. This is great and so are you for sharing.
ReplyDeleteYou did a fantastic job on the explanation and the pictures.
Submit this to Polymer Cafe quick.
Thanks again. Your work is amazing.
Wow! What a wonderful way to start the day! Thank you all so much for the wonderful comments, you made my heart sing, thank you! BJ
ReplyDeleteWow BJ - so simple but so effective. Thanks for sharing. I bet this cane will be popping up all over the place.............
ReplyDeleteAwesome tutorial BJ, thank you for sharing it!! :) I don't do much cane work and when I do, it's nice to have a good step by step to work from. You explained it so well and included great pics!
ReplyDeleteVery nice! The clear and exact photos made it easy to follow your instructions!
ReplyDeleteGorgeous BJ.
ReplyDeleteMore wonderful comments, thank you my friends!
ReplyDeletePlease share photos if you make a Border Cane.
Très joli travail bravo et merci pour ce partage
ReplyDeleteThank you so much for this tutorial, I've always admired your border canes and wondered how you put them together. I look forward to your next tutorial :-D
ReplyDeleteb
ReplyDeleteBJ, So wonderful of you to share. I've admired your border canes so much.It's a great tutorial. Thanks so much.
thank you for a very clear explenation and beutiful cane !
ReplyDeleteTova
Depuis le temps que je bave devant vos cannes et là vous nous offrez carrément un tuto merci pour cette générosité merci beaucoup
ReplyDeleteTHANK YOU for sharing this!!! The cane is so fun and your instructions are very well done.
ReplyDeleteThis is so wonderful! Thanks for sharing, I am going to try it today!
ReplyDeleteThanks, BJ - this is EXACTLY what I wanted to do today! I can't wait to get started!
ReplyDeleteI love making borders BJ, so thanks for sharing this tutorial...it's a fine one......can't wait to try it.
ReplyDeleteJean
Thank you for sharing! I love to play with extrusions, and this shows many possibilities! Great explanations!!!
ReplyDeleteThank you so much for your wonderful tutorial. I have never tried extruding canes and now I have the courage and know how! You have given us quite a gift!
ReplyDeleteFabulous. Can you do more tuts for the extruder?
ReplyDeletethank you !!!
ReplyDeleteThanks so much for sharing.
ReplyDeleteThis is a great tutorial. I can't wait to try it out.
Penny
BJ, Thank you so much. It's not only a very good tutorial, but your sense of humor has made my morning!
ReplyDeleteI hadn't planned to do anything like a border cane, but now, well..... now see what you've done!
I found your site through Polymer Clay Daily. Wonderful tutorial. Thank you for sharing!
ReplyDeleteNice job, BJ! This is really a generous contribution. I can see you worked really hard on this tutorial. Thank you so much for puttin' it out there. And congratulations on your PC Daily Feature. Just fantastic!
ReplyDeleteJulie/Dixie103
Thank you so much for this tutorial - I have learnt several new things from it, as well as the lovely border cane itself!
ReplyDeleteyour generosity is overwhelming and so kind! thank you for sharing your amazing technique!
ReplyDeletewith appreciation and admiration, lucia
Merci beaucoup
ReplyDeleteThank you-excellent!
ReplyDeleteThanks so VERY much BJ (also my initials) for your generosity and for taking the time to do this for everyone for FREE. Lovely gift. I am amazed the spiral cane doesn't distort after going thru the extruder - that was a revelation for me. I'm going to try your technique - the results are terrific.
ReplyDeleteSuper tutorial! Love the monochromatic color schemes. You CAN get enough contrast to make beautiful canes.
ReplyDeleteWow!! Thanks for sharing this awesome tutorial!!
ReplyDeleteWow! What a great tutorial! This certainly looks like a fun technique to play with. Thanks so much for sharing!
ReplyDeleteCarolyn
Thank you, BJ; this tutorial is terrific! You made me think about the many ways I've never used my extrusions.
ReplyDeleteGreat tutorial. Thanks so much for sharing! Congrats on the PD post!
ReplyDeleteGreat tutorial! Thank you for sharing!
ReplyDeleteCongrats on being featured on Polymer Clay Daily!
Thank YOU!! Amazing how simple canes combined make such an impact. I love your tutorial.
ReplyDeleteWhat a magnificent tutorial. So clear. I am sending the link to the ladies in Nepal because it is so clear and I think they will have so much fun experimenting with it. Language will be no obstacle! Thank you for your generosity with your time!! Wendy Moore
ReplyDeleteFabulous tutorial! Gratz on PCD!
ReplyDeleteSo many wonderful comments. Thank you all for stopping by. I look forward to seeing your versions of the "border canes". I hope you will share photos, I would be happy to post them here on my blog. Thank you all for making this an exciting fun filled day. BJ
ReplyDeleteThis was an excellent tutorial! I have an extruder with a syringe-like plunger and I cannot rig up the vise set-up you have. It may be time to buy one like yours.
ReplyDeleteThank you so much.
Oh yes Peggy, definite get a better extruder. I had one of the plunger types, it was way to hard to use even with a rigged caulk gun. The border canes would have never been made without my Makin extruder.
Deletesuch a great tutorial :) thanks for sharing and your inspiration :)
DeleteI am very grateful, for this wonderful tutorial. It was a long time on my list to make this Border cane only by watch imitating. But it is much easier and, above all, I would have made it even more complicated. Again, thank you very much Veronique Hoffmann / fimomaus
ReplyDeleteYou are very welcome Veronique. I would love to see the Border canes you make, please take photos.
DeleteThank You for this. I can't wait to 'play' with the ideas you've started cropping up in my head.
ReplyDeleteI would love to see all the finished ideas cropping up in your head, please take photos.
DeleteBJ, this charming and very professional tutorial you have so kindly offered represents what I have come to love most in the PC art community: the generous sharing of knowledge and inspiration in a spirit of common expression. Bravo and much gratitude!
ReplyDeleteThank you so much for the kind words Monique, I was happy to do it.
DeleteTHANKS SO MUCH for this tut cant wait to try it
ReplyDeleteThank you Carole, please share photos when you give it a try.
DeleteHow ingenious and beautiful...fantastic tutorial. Thanks for your generosity. This Tute will help me to create African & Egyptian textile canes that have been very tedious to cane using traditional methods...Mille Grazie
ReplyDeleteOh wow Mille, that sounds so exciting!! I would love to see your African and Egyptian textile canes, please take photos. I would be pleased to post them on my blog.
DeleteThanks for sharing!! georgeus tuto!!!
ReplyDeleteThanks for sharing!! georgeus tuto!!!
ReplyDeleteThis is an amazing cane and a FABULOUS tutorial! Thank you, I know how long it takes to create when you have to stop to snap a shot each step of the way so I really appreciate you taking the time to do that and then write up the wonderful tutorial!
ReplyDeleteYou are very welcome Keri Lee, I was happy to do it. Remembering to take a photo of each step was the hard part... I missed a couple but will do better next time.
DeleteReally beautiful cane, I will try too in orange or lime green tones, thanks you so much for sharing
ReplyDeleteThank you Laurette, I would love to see it in orange or lime green, please take photos!
DeleteIn this current climate of charging clay folks to access innovative and exciting tutorials like yours, it is so wonderful you take so much time and care to share your beautiful work with us. thank you so much. I'm off to my work table to do this, so inspired. Your comments about your hands made me laugh...yup. I know how you feel...I need a hand double for closeups for my class handouts, too! Thank you once again....Kerrie
ReplyDeleteThank you Kerrie, I have learned so much from all the wonderful sharing folks in the polymer clay community I thought it only fair to play it forward. Please take photos, I would love to see what you make. BJ
DeleteI can't add to the wonderful comment above except to thank you sincerely for taking the time and effort to do this amazing work, and to share it with us. It really is phenomenal!
ReplyDeleteInnovative, beautiful, endlessly useful, and drop dead magnificent.
Barbara
Thank you for sharing ! The tuto is so nice and useful!
ReplyDeleteA friend just directed me to your tutorial. Outstanding. Thanks for sharing.
ReplyDeleteThank you!!! I love seeing if I have the canes figured out before I see the tutorials, I did miss a few of the steps... :) so thank you for providing this!!! Your awesome!
ReplyDeleteThanks so much for sharing this! What a beautiful border cane!
ReplyDelete~ Holly Williams
Thanks a lot for this great tutorial!! Must try making it one day....
ReplyDeleteEfrat
You're very generous with your talent. I, too, learned something new in finding that a jellyroll cane would extrude so nicely. That will be very helpful. I can't wait to make some nice borders, as soon as what's baking in my little polymer clay oven is finished and I can turn my attention to my extruder. Thanks so much.
ReplyDeleteLee Luda / Bavaria
Thank you for this tutoria, I love i and wil surely make one.
ReplyDeleteAs well what a great idea to attach the clay extruder to the workbench.
great idea
You are welcome. I would love to see the ones you make.
DeleteGreat tutorial! Thank you for sharing! I have posted a link to it on my blog, I hope my readers will find it as useful and clear as I do; I will most certainly try to do a border cane soon, I would be very glad if you could visit my website and tell me what you think of it: http://alabalabijoux.com
ReplyDeleteluciana
I apologize for not replying sooner, I just now read your post. I was happy to share the tutorial, I hope you and your readers find it useful. I visited both you blogs and found them exciting and beautiful, I enjoyed reading and viewing them very much.
DeleteJust came across your tutorial, it is great! Thanks so much for sharing!
ReplyDeleteHi Monique, You are very welcome, I hope you find it useful. It you give it a try I would love to see the results,
DeleteI was so sure I had commented on this before BJ--but just let me say in case I didn't, that this is one of the coolest tuts on the web--not only because of the detail and expertise, but the warm and friendly way you present it. If nothing else--and I know there's a LOT else, your immortality in the halls of Polymer Art is assured.
ReplyDeleteI think that is the nicest thing anyone has ever said to me...., I thank you very much!!
DeleteOne more thank you. I love boarders and you have so inspired me
ReplyDeleteThank you very much, I love borders too.
DeleteFound this via Pinterest- GREAT Tut, so inspiring - thanks for sharing
ReplyDeleteMerci beaucoup pour ce joli tuto que j'ai utilisé pour faire quelques bijoux avec des amies vous pourrez voir sur mon blog
ReplyDeleteErnie Jackson Hendrix shared this on IPCA on Facebook today, and it is WONDERFUL! Thanks for sharing your skill!
ReplyDeleteThank you for sharing your work. I am going to make this tonight!!
ReplyDeleteWoooooow! Looove it 😍 Thank you very much for sharing! This tuto is really AMAZING... like you😊! Great explanations! Thank you once again 👏👏👏👏👏👏👏👏👏
ReplyDeleteAwesome tutorial, so clear.y explained and demonstrated! I hope you do LOTS of these! Thank you so much!
ReplyDeleteFantastic tutorial, great descriptions and excellent photos. Just one thing, which I find with quite a few tuts for polymer clay. How much clay do you start with? I'm fairly new to the polymer clay universe, but the amount question is a bit of a challenge for me, so any tips greatly appreciated. Thanks again for sharing.
ReplyDeleteThank you!!! Perfect tutorial! <3
ReplyDeleteThis is one of the best tutorials I have seen! I've been working with polymer clay since the 1990's (since I was stationed in Germany). And I learned some NEW stuff today! Thank you so much. Since we are all stuck at home with the COVID-19 virus, people like you are a Godsend.
ReplyDeletesE EU COLOCAR O CANO FEITO ROCANBOLE NA EXTRUSORA COM A SAIDA QUADRADA ELE NÃO VAI SAIR DEFORMADO? ME DESCULPA NÃO ENTENDI.
ReplyDeleteI was wondering, why is it almost impossible to push the clay through the tube
ReplyDelete