Saturday, May 26, 2012

BJ's Border Cane Tutorial

At long last here it is....a simple version of my Border Cane.  I hope you like it and find it useful.  This is the cane we are going to make.  Click on the photos for a closer look.


First of all you will need a pasta machine, mine is a "Monafied" Atlas so I will be referring to the settings on it.  And you will need a good extruder. I use a "Makin's Professional Ultimate Clay Extruder" and a "Workzone" vise.  The vise isn't a must, you can turn the extruder by hand but I'm old and have arthritis in my wrist so the vise saves a lot of moaning and groaning.. it works for me.

You will need to select your colors. I used shades of purple for this cane. You will need 3 shades of whatever color you choose, (or you can use 3 different colors) one dark, one medium and one light. I mixed colors to match a paint sample, you can see a portion of it above the cane. I use a combination of clays to get the right consistence. The new Premo and new Kato are both very soft for caning so I add other firmer clays, like older formula Kato translucent and/or white Pardo Art Clay (the kind in the blister packs, not the jars). You can also leach the clay until it becomes firmer but I don't have the patience to leach.  You want the clay to be firm enough to not squish when you work with it but not so firm that it's difficult to put though the extruder.... like Goldilocks you want it to be "just right".

First I made 2 bullseye canes and a jellyroll cane. One bullseye cane is the light color with a dark border, the other has a dark center with a light border.  To make the bullseye cane roll a log of light clay, run a sheet of the dark clay though the pasta machine to the #4 width and surround the log, do the same with the dark log and light border.

I made the jellyroll cane with long strips of all three colors, place the strips on top of each other and roll them up like a jellyroll.  Then add a border with one row of light clay and an outside row in the medium color.  If you need visuals, there are free tutorials on how to make both bullseye & jellyroll canes... just Google them.


Each of the canes should be approximately 1/2" wide and 3" long.


Using the square disk for the extruder insert the jellyroll cane into the barrel of the extruder. Make a 1/4" plug of the medium color clay and place it in the end of the extruder.  If you don't use the plug  the first part of the clay that comes out of the extruder is distorted, the plug avoids wasting the design.  It also just occurred  to me that I should have made a plug for the other end of the cane for the same reason... sheez, wish I'd thought of that earlier.


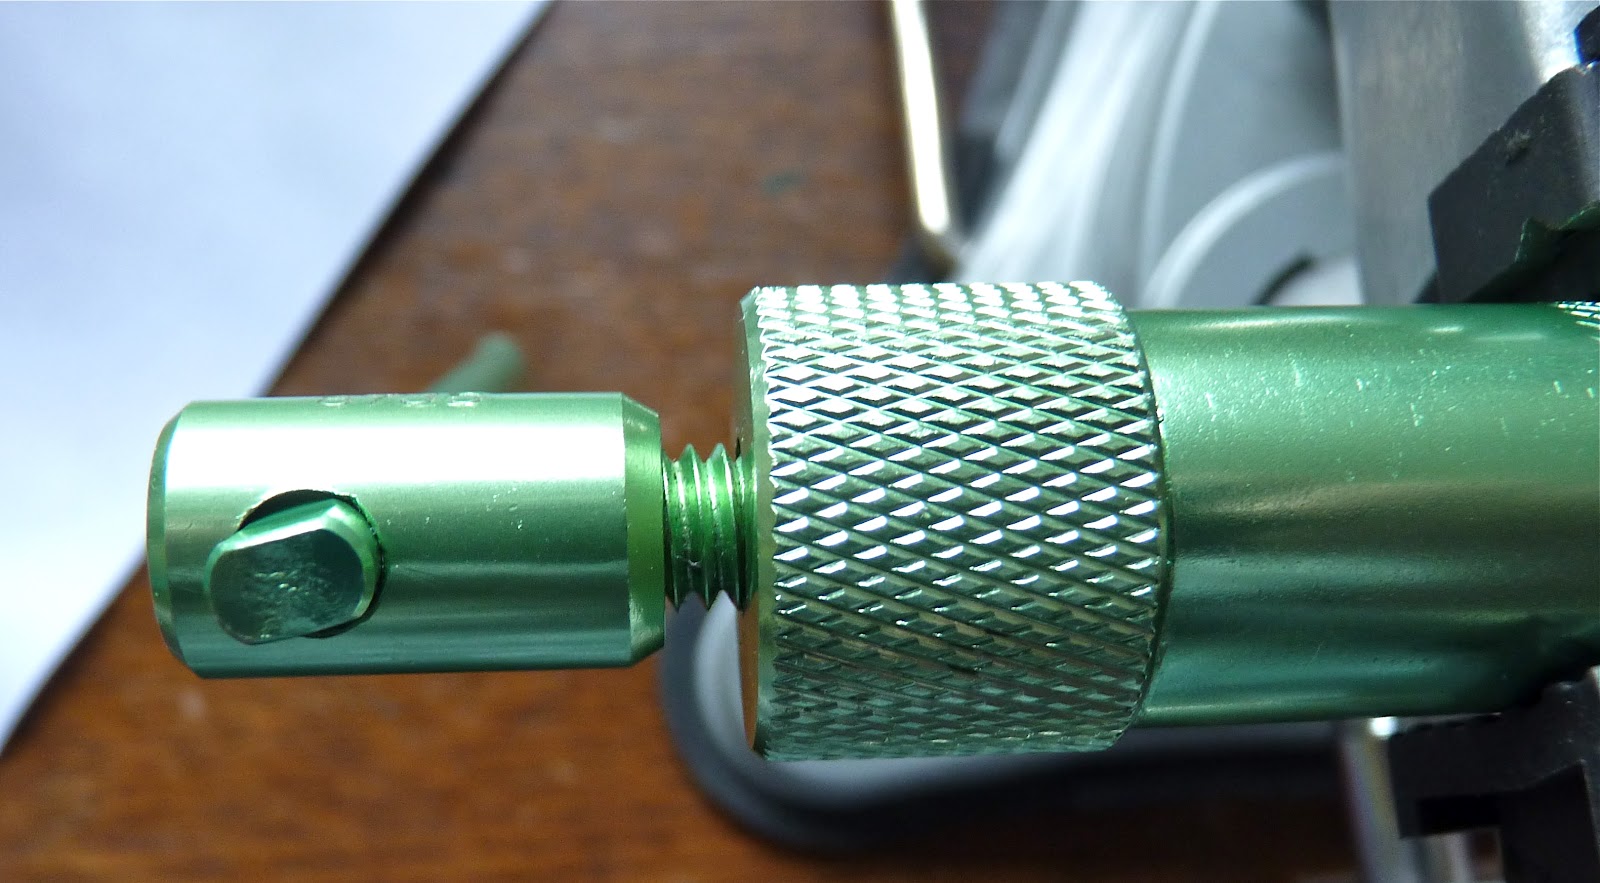
Secure the extruder in the vise and extrude away. My vise is an inexpensive one with a suction pad, the suction doesn't work on my table so I use a pasta machine clamp to hold it in place.


To save wear and tear on your extruder don't wind it all the way down, those last few turns are always the hardest and the last clay out of the extruder is wavy and unusable anyway.  Make those last few turn after you have removed the cap and can pull off the remaining clay,


The extruded cane will be quite long so you will need a long area where you can lay it flat. I have two work areas, one where I sit and one where I can stand.  The standing area is an antique postal desk so it is long enough for me to lay out long canes. I put down parchment paper beside my work area to lay the cane on and keep it clean.

Trim the first 1 1/2" To 2" off the end, that will be the"plug" and any distortion to the jellyroll cane.


Cut the extruded cane into 2" lengths


Lay them side by side


Here is how they look from the end.


Run a 2" strip of the darkest clay though the pasta machine to the #4 setting.  Lay it on the work area below the canes.


Pick the canes up by gently sliding the cutting blade under them and then place them on the dark clay strip.


Trim the sides of the sheet with your blade.....


....and again using your cutting blade pick it up, flip it over and place the uncovered side of the canes on the clay strip. Smooth the sheets in place and work out any air bubbles. 

.

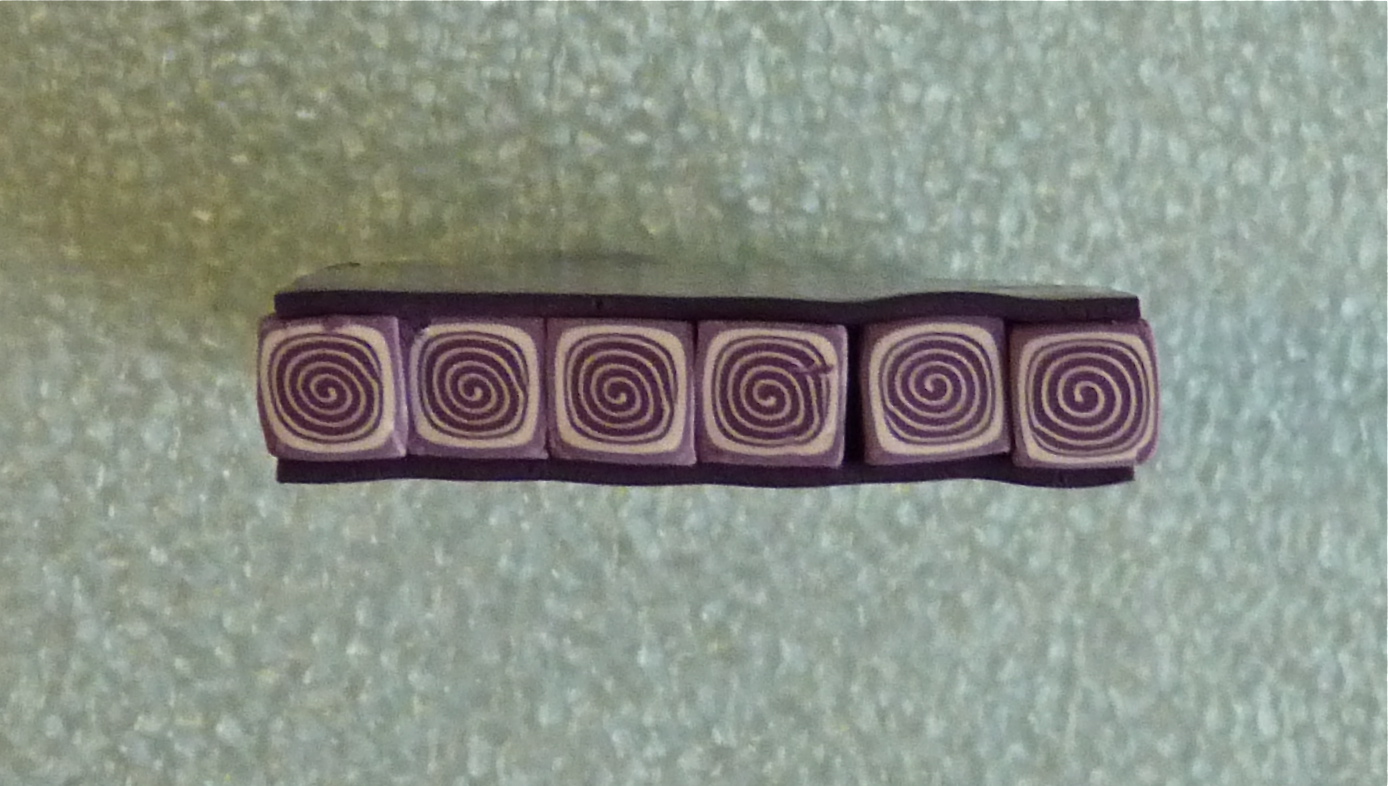
Both sides are now covered, this is how they look from the side.


 Now pick up the row of canes and gently pinch one end.. like so.  Yikes!  don't look at my ugly fingers and nails, I've been working in the yard.
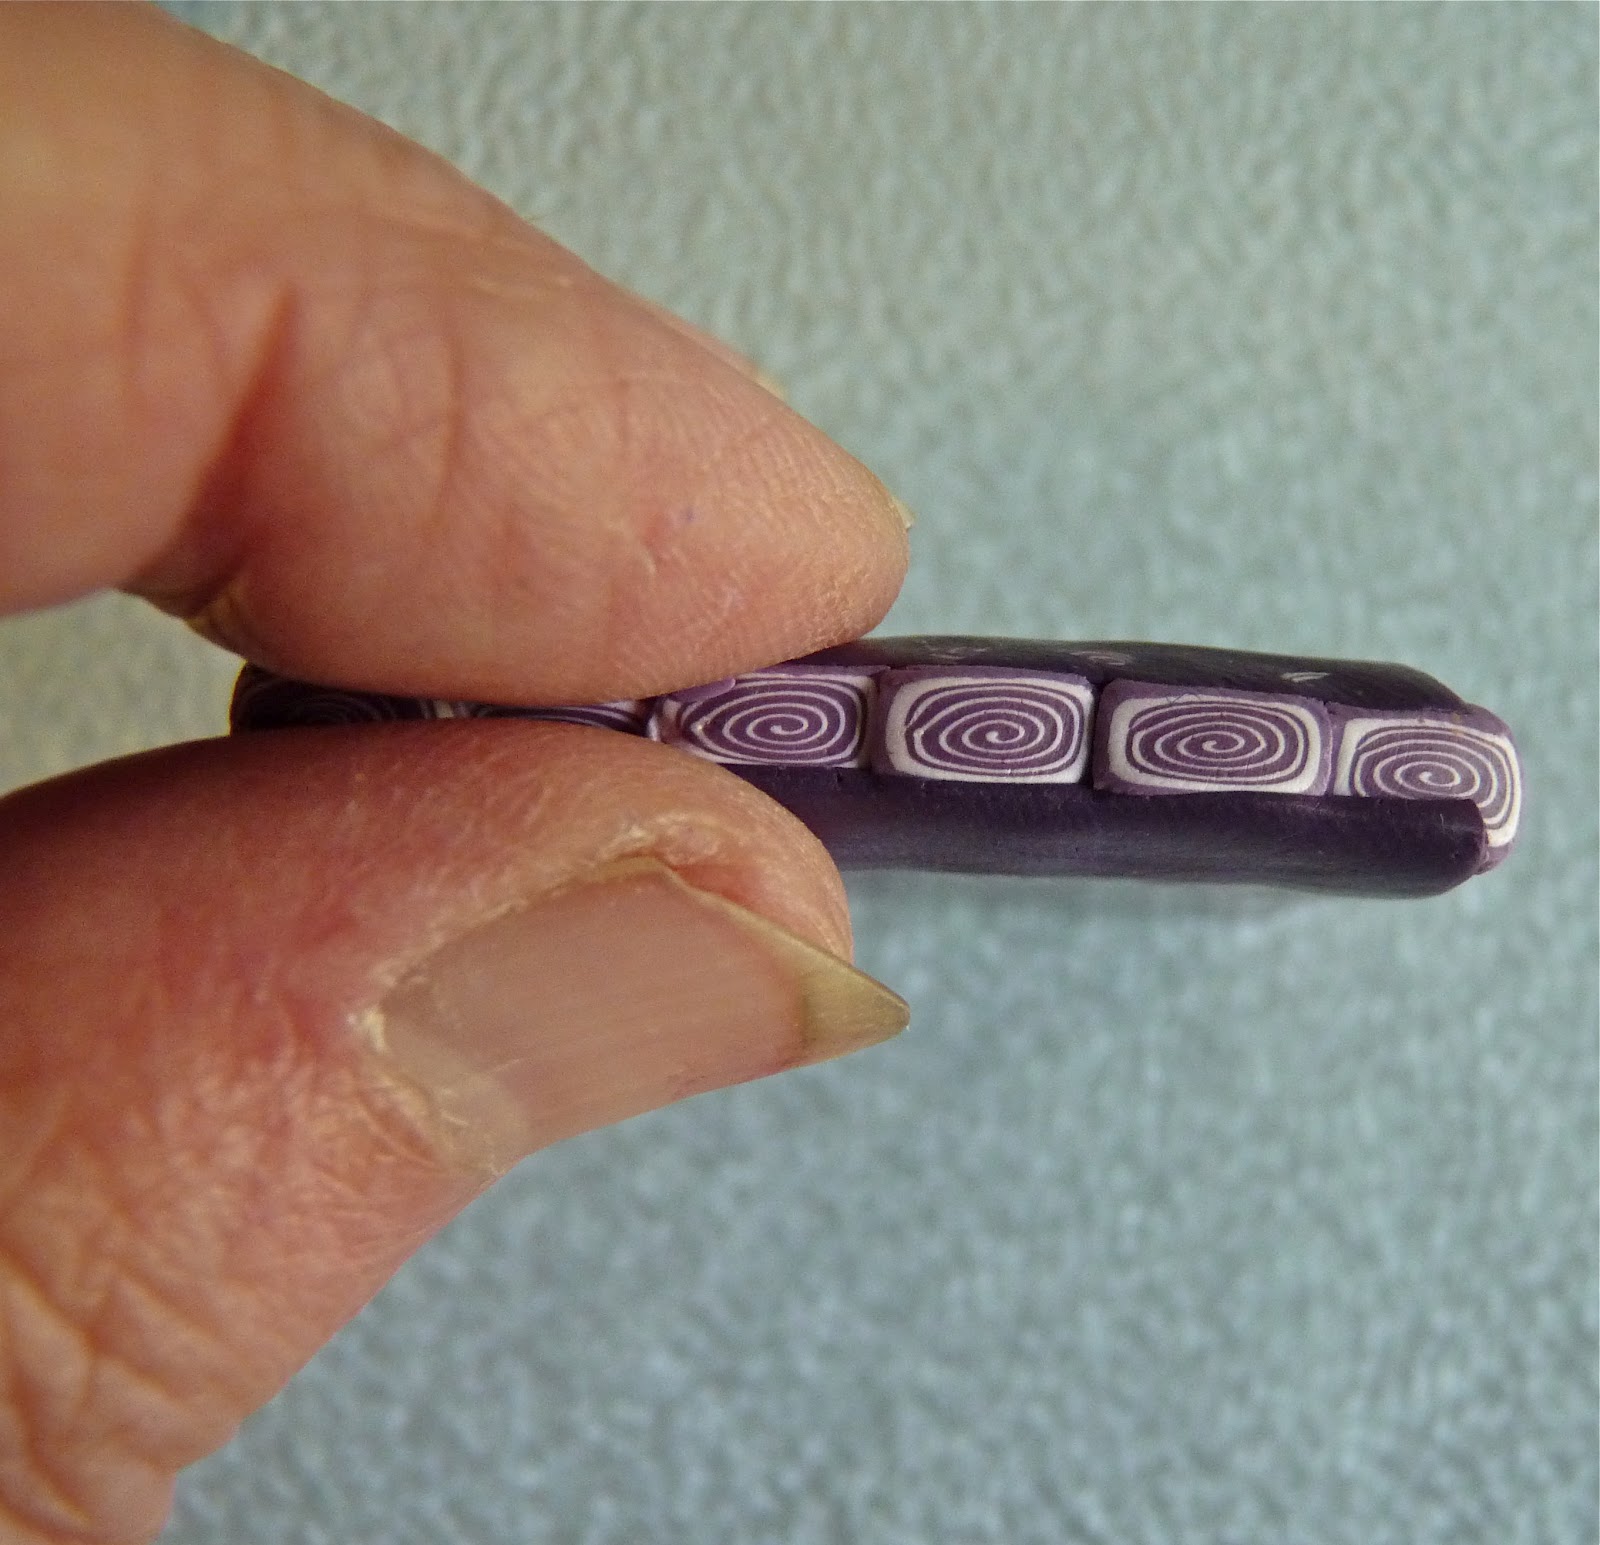


Run  the strip through the pasta machine on the #1 setting, pinched end first. Take care to insert it evenly to prevent distortion.  Lay it out flat on the work area.


Trim the ends.


Cut in half and set aside.


Change the disk in the extruder to the equilateral triangle and get out the bullseye canes.


Insert one of the bullseye canes in the extruder, remembering to place a plug of the border color at the end of the cane. If it is difficult to slide the cane into the extruder lightly dust it with corn starch. I use a cotton hanky filled with cornstarch to dust a little onto the cane.


This extruded cane is going to be twice as long as the square one so extrude slowly so it won't kink or break.  Lay it out flat and cut into 2" lengths.


You should have 2 sets with 6 2" pieces in each set.


Now do the same with the other bullseye cane..... don't forget the plug....


Cut two sets of 6 to go with the others from the first triangle canes.  I had a couple extra, I can play with those later.


Place the dark triangles in between the light triangles making sure that both ends line up properly. Press them together.


Trim the ends.


Run a 2" x 2" sheet of the lightest color clay through the pasta machine to the #4 setting and do the same with a 2" x 2" sheet of the darkest clay. Place both sheets on the work area.  Place the triangle canes, light side down, on top of the dark sheet and trim. Slide the blade under the clay flip over onto the light sheet and trim as before.... clear as mud right, sorry.... I forgot to take the photos,  the end product should look like this.


Now do the same with the 2nd set of triangle canes.  Pinch one end like before.....


....and run through the pasta machine, pinched end first. Do  the same with the 2nd row of triangle canes.  As you can see, the 2nd one went a little wonky so I had to trim off that end.  Trim the ends on both sheets. .


The sides are ragged, I will take care of that later.  Cut each sheet in half.


Take the 2 pieces from the first sheet and fit together like so..... do the same with the 2 pieces from the second sheet. Set these aside for now.


Roll out sheets of light, medium and dark clay to #4 on the pasta machine.  Cut two 1 1/2" squares of light, two 1 1/2" squares of medium, and one 1 1/2" square of the dark  Assemble the center of the border cane by placing the squares on top of each other... light, medium, dark (in the center) then medium and light. 


Here is how they line up from the side.


Now we are ready to assemble the border cane.  Lay one of the jellyroll sheets on the work area, place the stripe center cane on top of one of the jellyroll canes and trim off the excess jellyroll cane.


Flip it over and lay on top of the 2nd jellyroll sheet and trim the excess once again. 


This is how it looks so far.


Now put the triangle sheets on each side.... like this.  and trim the ends.


The sides are ragged so stand the cane on end......


and trim the sides.  I usually don't have to trim as much as this but all the sheets came out of the pasta machine with ragged sides and they need to be cleaned up.


And here is the FINISHED BORDER CANE. The cane measures 1" wide x 1 1/2" long x 1 1/2" deep.  This is smaller than most of the border canes I've made but it shows you how they are made.
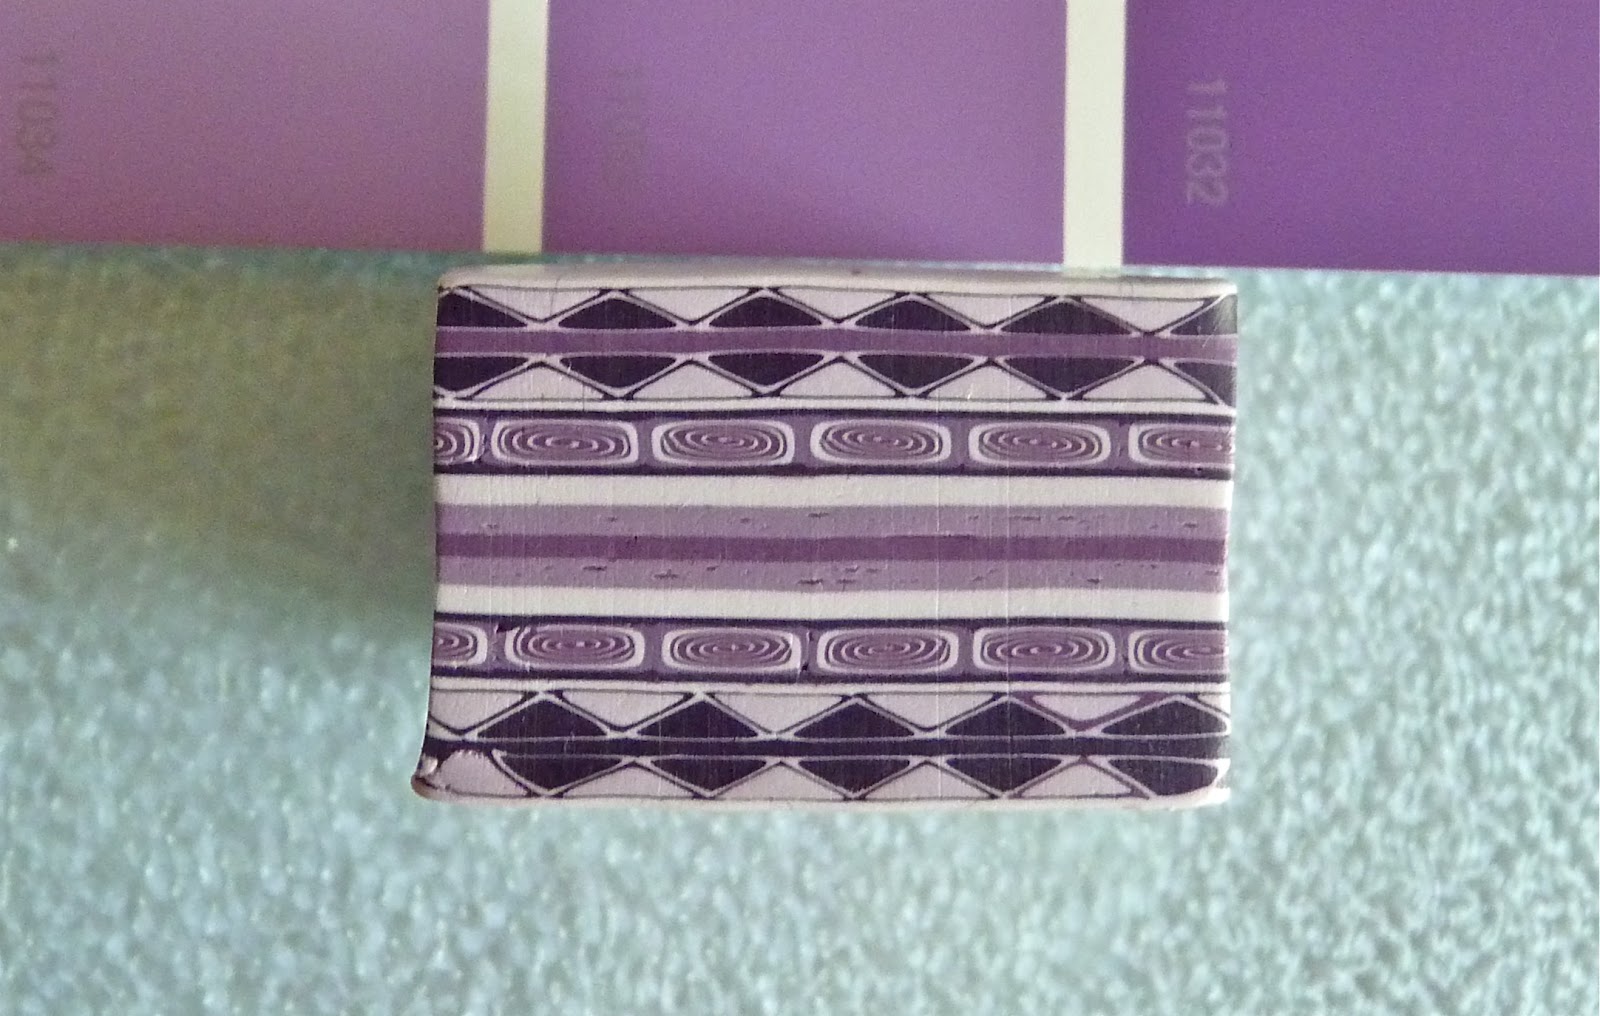

As I gathered up the scraps I couldn't resist making at least one mirror image tile and a little square cane.  I still have the end pieces that I trimmed off and some odds and ends scraps, they are always fun to play with.


I hope you find the tute useful. If you have any questions or need additional information please let me know.   (Poor Bonnie can stop holding her breathe! She has to be dark blue by now!) 

Thanks for stopping by. 

Sunday, May 20, 2012

Polymer Clay & Colored Wire Necklace & Earring Sets

I'm still spending most of my time in the yard but I did finish a couple necklaces.


I showed you the beads on this one in my last post.  I made additional links with glass beads and black wire and finished the necklace with black chain.  Last time I was at Michaels they had lots of these beads and chain on sale for 50% off. I wish now I'd bought more chain..... guess I'll have to wait for the next sale.  Click on the photos for a closer look.


Close up of the necklace.


Close up up the earrings.


I made these beads back in March when I was making my border canes.  I made the wire element last week while  watching my sunday night shows.


Close up of the pendant.


Close up of the earrings.


Sorry about the poor quality of the photos, Heather isn't here on the weekends and I had take them myself.

More photos of my flowers..... I take better photos outside.  I plant a lot of flowers in pots, it's easier  on my back, I can set the pots up on the steps so I don't have to bend over..... plus the  rabbits don't eat them if they are in pots, the squirrels are another story.  The squirrels don't eat them but they do dig in the pots and toss the flowers out on the ground, makes me crazy!!


Fritz is my house cat, this is the first time he has been outside is 5 years.  He usually sits in the window and looks sad. Now he goes out when I do and is having a great time exploring the yard.  He is a scaredy cat though, the least noise sends him running in the house, I have to keep the back door open so he can dash inside.


More flowers in pots.


Gorgeous yellow pansies!~


This is great granddaughter Lily playing in the gazebo, she calls it her "little house".  Here she is  showing me her runway pose.... notice the fancy foot work.


Little stinker picked on of my hydrangea... said she needed it for her "bride bouquet".  She was a flower girl in aunt Amanda's wedding but was to shy to walk down the isle.


That's it for this week.  I took the photos for the border cane tute,  well most of them anyway... I missed a couple steps.  Now I have to edit the photos and write the instructions.  Good thing I don't have to make a living writing tutorials......

Thanks or stopping by.


Sunday, May 13, 2012

HAPPY MOTHER'S DAY

I did do a little claying this week but mainly I want to wish all the wonderful Moms, Grandmas and Great Grandmas a very Happy Mother Day's.   I hope each and everyone of you has a wonderful day filled with  love,  good eats you didn't have to cook and cool presents.... I love presents, don't you?

I am still spending most of my time in the backyard but I did manage to make a couple necklaces.

The first is a reversible heart necklace.   Click on the photos for a closer look.

This is the front. I added colored wire to jazz it up a bit.... and strung it on a faux suede cord.  I didn't sand or buff the hearts, I like the matte look this time.


I added copper beads on the back.... now if the pendant flips over no one will know it's the wrong side.


This necklace gave me fits.  First I cut a square opening in the circle.  I didn't want to toss the square in the scrap bag so I folded it over and used it to create a bail.  I made matching beads and strung it on a faux suede cord.  I was happy with the way it look from the front.....


not so much from the back..... I used one of my leaf textures to make the backing but I don't like the way the bail looks from the back... to messy. 


I took the pendant off the cord and added a textured heart to the back. I like the back better now. 


Then I wasn't happy with the front. I tried stamping a flower design with silver ink inside the  "window"... not happy with that, it didn't show up well, I tried outlining the silver flower with black ink..... where is Alice when I need her?  that didn't go over well.  I removed the ink with alcohol on a Q-tip.... by then I have a smeary mess in the little window.  I kept dabbing it with the Q-tip,  got most of the ink off and went  to my fall back solution to cover a  mess.... Swarovski flat back rhinestones.  I'm still not crazy about it but it will have to do. 


I tied knots on each side of the bail to keep the pendant is place. The bead holes are finished with eyelets. They fit nice and snug on the suede cord and stay in place or can be moved around if desired. 
I like using the cut out square for the bail and will do it again. I like the look of the open cut out in the first photo best so next time I will find a better way to finish the back. 

I made beads to keep my hand busy while I watch television.  They need to be sanded and strung. 


Tonight is my tv night..... 3 hour Survivor finale ( I usually watch Amazing Race, Good Wife and the new show NYC 22) then the The Killing, Mad Men and my all time favorite show... that I save for last, King of Thrones.   

I resisted watching King of Thrones all last year, was put off by the incest in the first episode and the tossing out the window of the little boy.... Heather assured me the little boy wasn't killed and urged me  to give it another try, when I finally did I couldn't get enough of it, now I'm hooked.  

Okay now here are more photos of my yard.... I bet you thought I forgot... or you were hoping I forgot. Not a chance, I love my flowers. 

Gazebo from the front, 


and from the back, it could use a trim, it grows so fast!


There are hanging baskets all around the gazebo. 

The squirrels love this one filled with petunias, they keep digging in it and I keep filling in the holes. 


This is my favorite. 


Same flowers only in orange.  


This one is pretty too.  


Some of the flowers planted around the gazebo are starting to bloom too. 


That's it for this week... I'll show you more flowers next time. The lilies are starting to bloom as are the  hydrangeas, the roses, the bee balm and more.  I haven't spotted any hummingbirds yet but surely they will come. I have spotted several honey bees, which made my very happy. 

Thanks for stopping by! 

Wednesday, May 2, 2012

Mirror and flowers

Wow I didn't realize it had been so long since I last blogged.  Did you miss me?

Our granddaughters wedding was April 6th, it was the nicest wedding I've ever attended. Amanda was a very laid back bride and set the tone for a stress free wedding. I was hoping to have wedding photos to show you but I'm still waiting for son Brad to download the photos he took to his Flickr page.  Here is a snap shot of the bride and groom that Amanda posted on Facebook.


After the wedding I was busy doing tax returns.  I didn't have as many to do this year  so I put it off until the last few days and barely finished by the dead line.  Thanks goodness that is done for another year!!

The rest of the time I have been doing yard work.  Spring arrived early this year so we didn't have to wait for April showers to bring May flowers.... we have been enjoying early spring flowers of all kinds.  I took lots of flower photos.... I'll show you later.

I haven't had much time or inclination to play with clay, my muse is getting inspiration from planting flowers.....  but I did cover a mirror and a tealight holder.

Here is the mirror. I bought several inexpensive beveled mirrors and tealight holders at Wal-Mart. This is my first attempt a decorating a mirror.  It went pretty well except the rubber pads on the back of the mirror melted in the oven..... next time I will remove the pads.


Here is the tealight holder.


And here is how the look together.


And of course I made a couple pendants with the scraps.


I took a ton of flower photos..... here are a few.

This is the back of our house, the one story portion was originally a dentist office and is now my studio and office.  The window on the left is my clay room.


This is the flower bed under my studio windows.  We planted a couple new foxgloves and a peachy color Iris,  the rest were already there... well, not the hanging basket, that from this year too.


Foxglove flowers fascinate me, I love having them just out side my window.


Our local fruit and vegetable stand has such pretty hanging baskets this year and they were reasonably priced.... so I bought several.  The purple petunias are yummy, I don't know the names of little purple and pink flowers.


and last but not least a close-up of the clematis


Next time I will show you my gazebo and more hanging baskets.  Wish I could show you the cardinals and bluejays that hang out in the back garden but when I go out may cats go with me...  so the birds stay clear until we go back inside.

I have not forgotten my promise to make a "border cane" tute..... it is in the planning stage and I hope to have it done very soon.

Hope you all are enjoying spring as much as I am.... although I could do with out the scary weather!!

Thanks for stopping by.